Workload
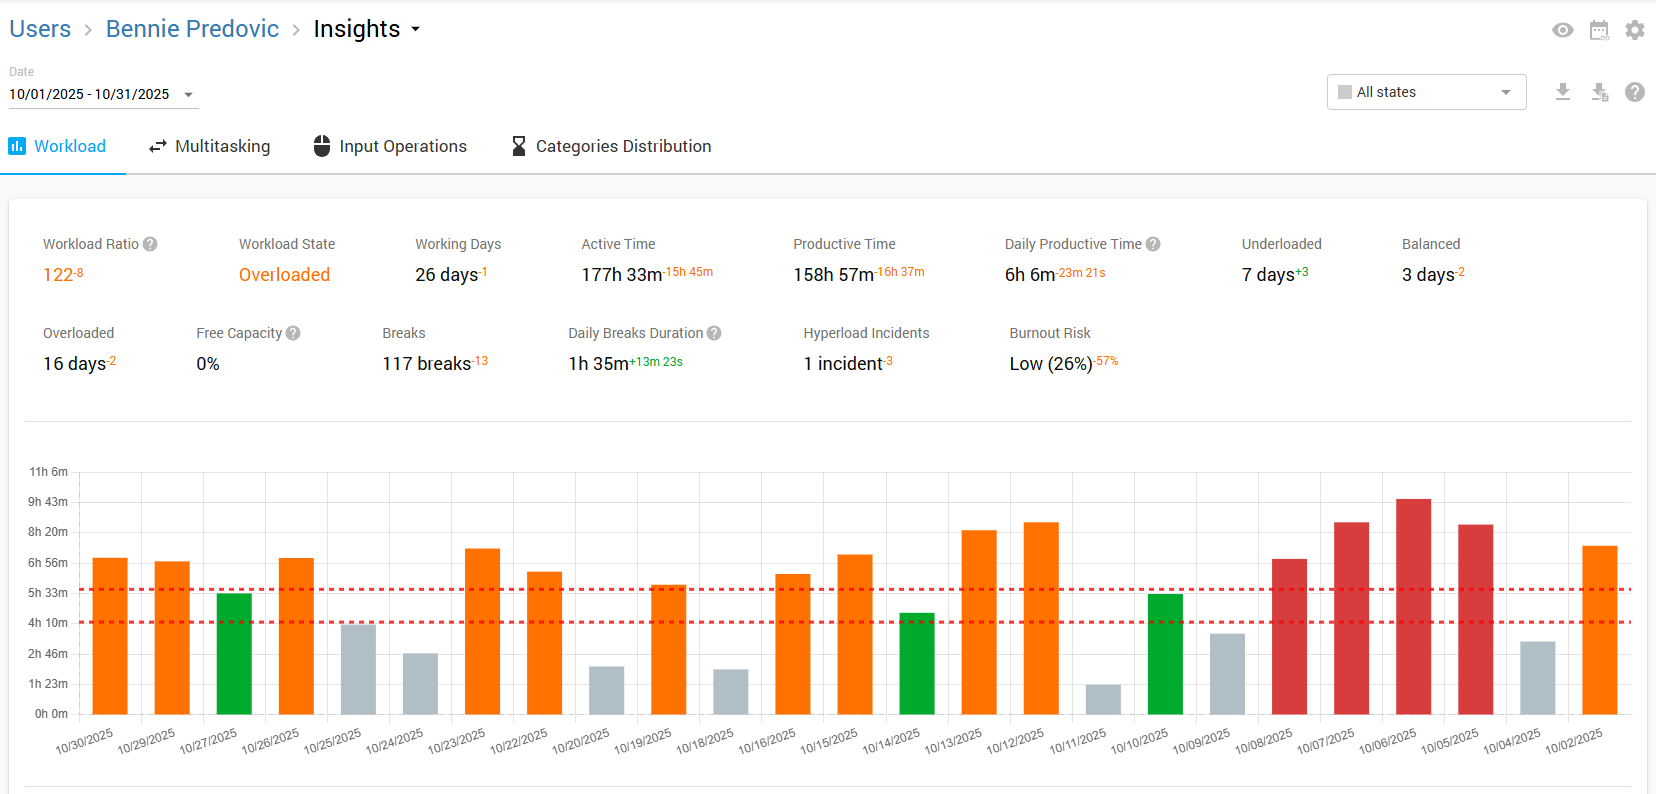
Get a high level summary of employees average productive time, number of breaks, and average break duration. Find out how many of your employees are underloaded, overloaded, maintaining a balanced workload, or at risk of burnout.
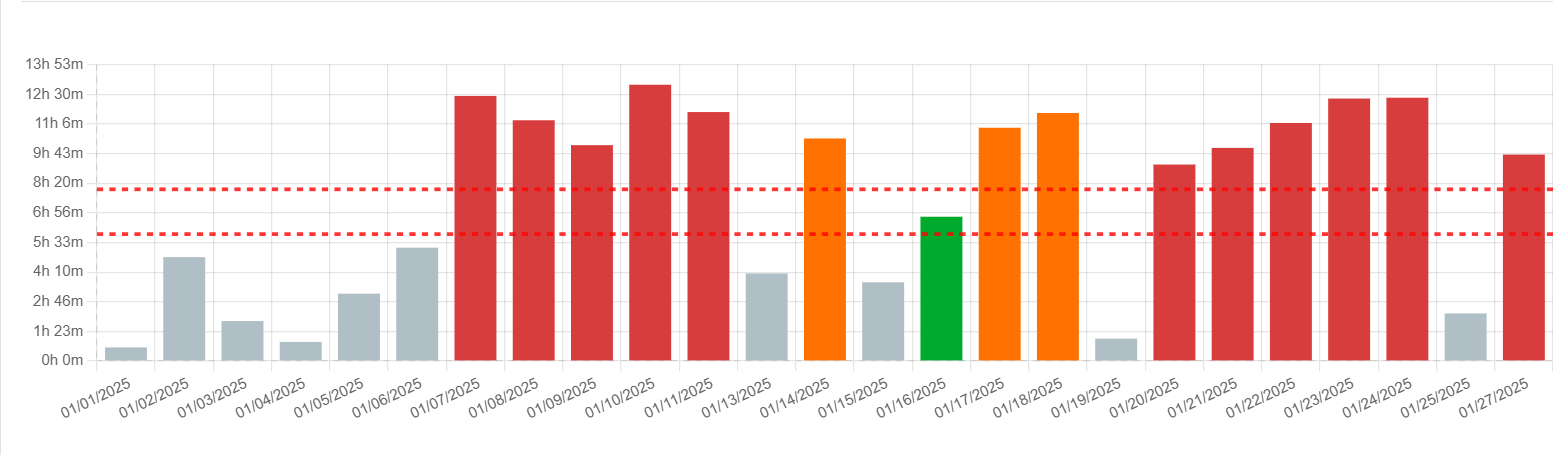
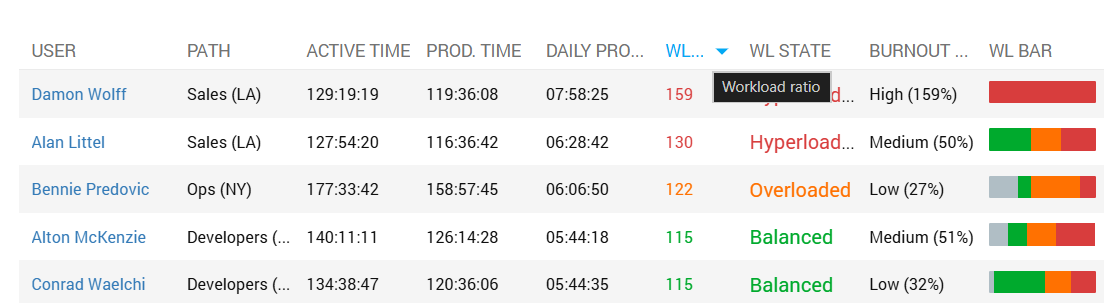
Workload Color Code
- Red: Burnout Risk: If the percentage of productive time worked on hyperloaded days exceeds the burnout risk threshold relative to the target productive time goal, the employee is considered at risk of burnout. It is recommended to use this metric with at least 20 working days for it to be more meaningful.
- Oranage: Overloaded.
- Green: Balanced.
- Gray: Underloaded.
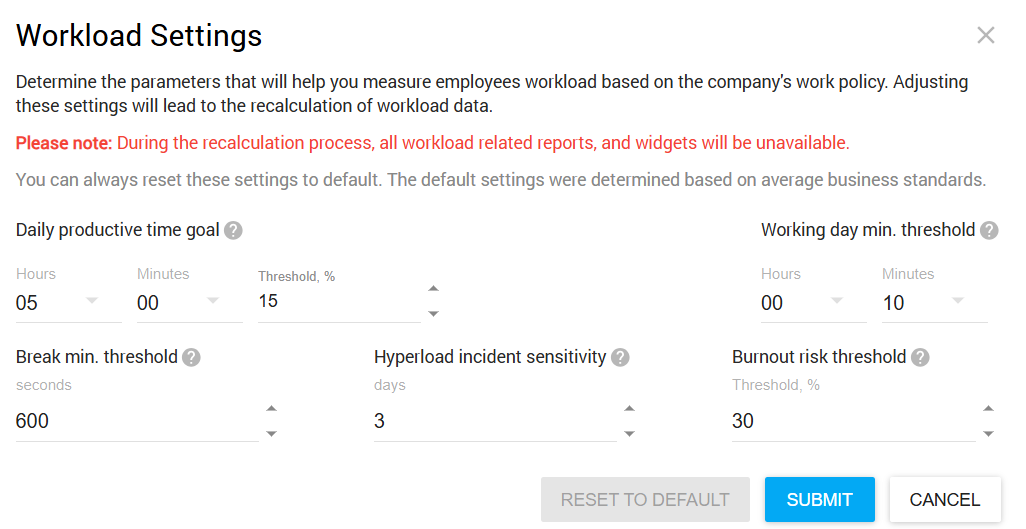
How is the Workload Measured?
The workload is determined using the goal specified in the Workload Settings (By default ~5 hours of productive time). Employees with fewer productive hours than this threshold are viewed as underloaded, while those within the target range are considered balanced. If their productive hours surpass the threshold, it suggests they are overloaded or potentially at risk of burnout.
Workload Ratio
This metric will help you understand employees workload level by comparing it to a predetermined standard.
Workload Ratio = (Prodctive time/Productive time goal)*100%
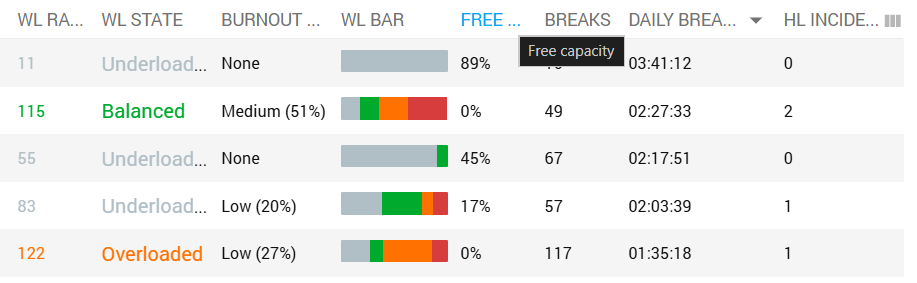
Free Capacity
With the help of this metric you can find out the percentage of the employee’s working hours that can be reassigned to other tasks.
Free Capacity = 100% - Workload Ratio
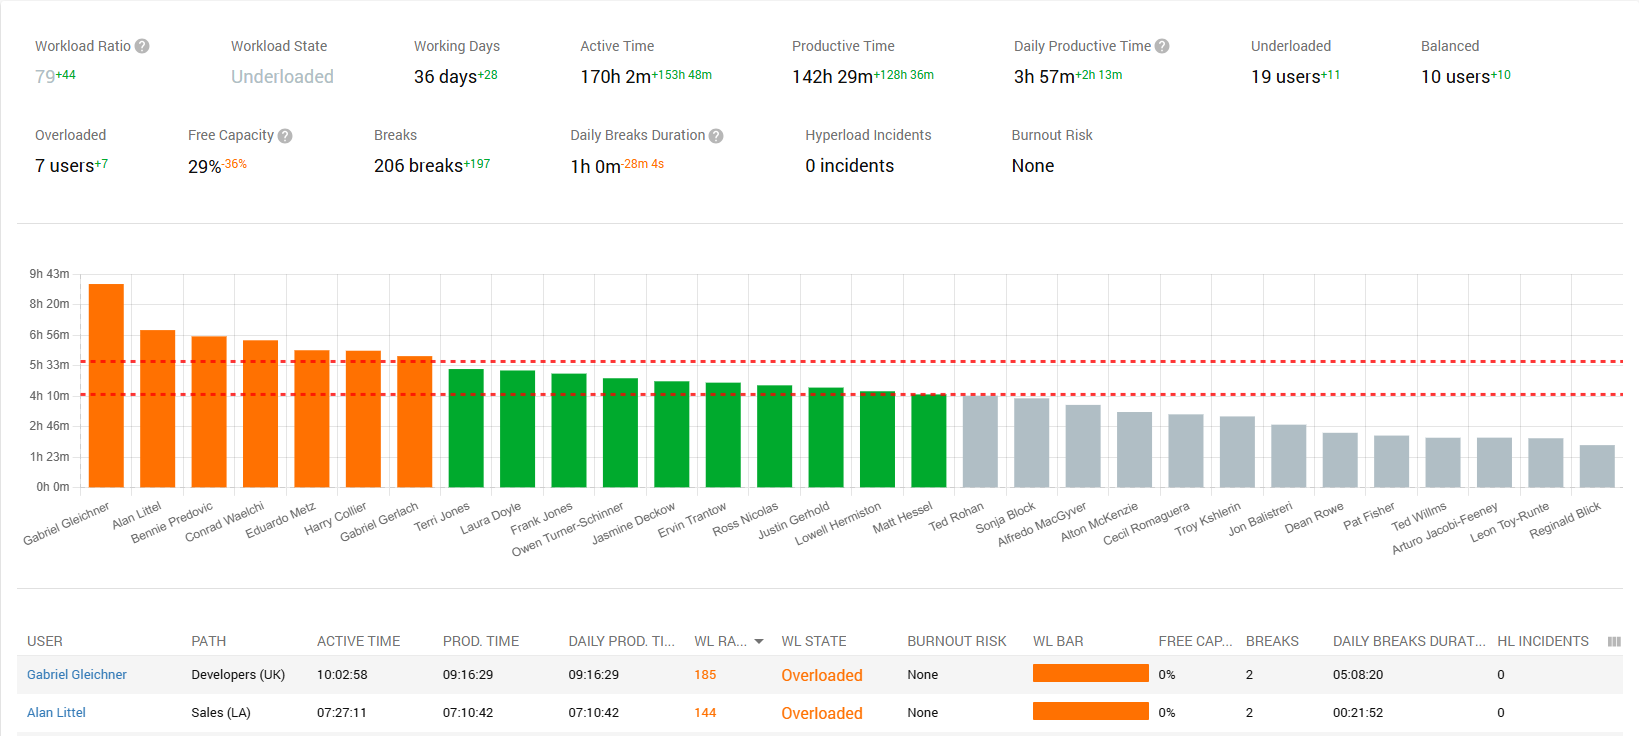
Workload by Departments
Get the workload summary per department to receive a higher level understanding of workload distribution.

Clicking on an employee’s name will drill you down to his daily Workload summary. Here you may review the employee’s Workload summary for each working day.